What is the difference between the Endorsement Forms tab and Endorsements tab?
Endorsement Forms Library
The Endorsement Forms Library is a global repository of endorsement forms that can be reused across insureds.
These forms are generally blanket forms that do not contain insured-specific information. Endorsement tags can be added to the forms so that insured-specific information automatically populates when the form is used for an insured.
Insured Endorsements Library
The Insured Endorsements Library contains the endorsements created or selected for a specific insured.
Insured endorsements are connected to the applicable Line of Business and policy. They can be added to certificates individually or through bulk processing workflows.
Continue reading below to learn how to create and manage endorsement forms and insured-specific endorsements.
Access the Endorsements Manager
From the Managers menu, click Endorsements.
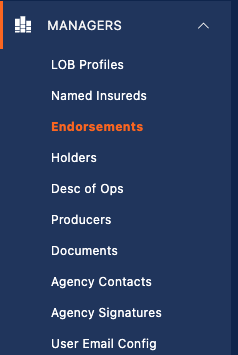
The Endorsements Manager is divided into two sections:
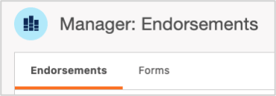
- Endorsements: Insured-specific endorsements
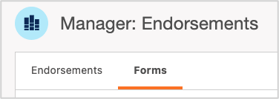
- Forms: Global Endorsement Forms Library
Insured Endorsements Library
Endorsements Forms (Global) Library
Endorsement Form Library
To create an endorsement form to add to the Forms library, within the "Forms" tab of the Endorsement manager, click the orange "+ Create Endorsement Form" button.

This will bring you to the Endorsement Form creator.
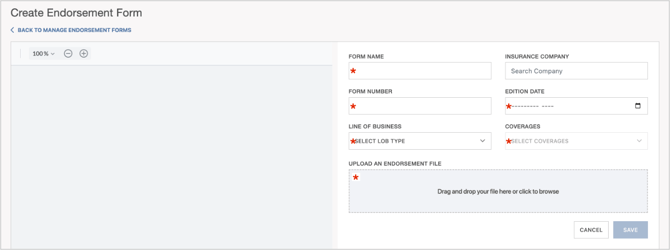
While creating the endorsement form, the following areas are required to be filled out:
Form Name - the name given to the endorsement form to easily identify it within the endorsement form library manager.
Form Number - the form number of the endorsement.
Edition Date - the endorsement's edition date.
Line of Business - the policy the endorsement is being uploaded for (i.e., General Liability, etc.).
Coverages - the coverages this endorsement applies to (i.e., additional insured, waiver of subrogation, etc.).
The Insurance Company is not required, but can be added if preferred.
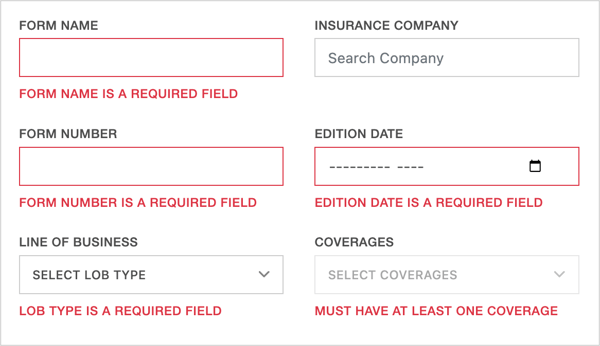
The document will also need to be uploaded.

Once uploaded, the document will appear in the preview window on the left side of the page. You may then add endorsement tags to the form.
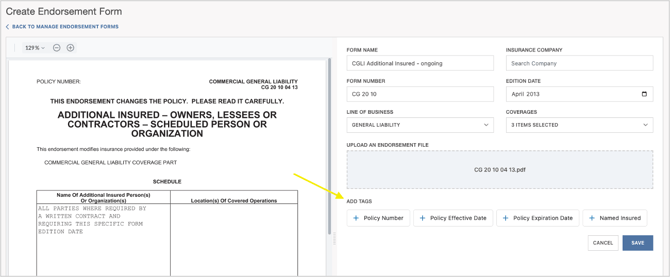
Add Endorsement Tags
Endorsement tags act as placeholders for information that Certificate Hero will automatically populate when the form is used for an insured.
Select the applicable tag and drag it to the desired location on the endorsement form.
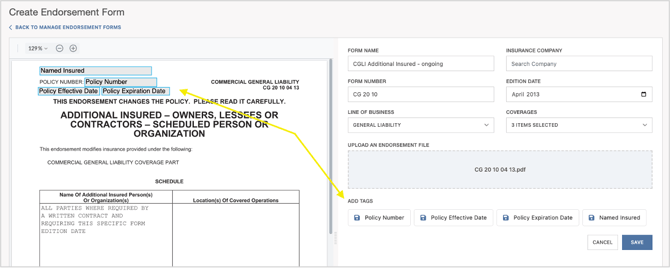
The same tag can be added more than once. This is helpful for multi-page endorsement forms that need to display information—such as the policy number or policy dates—on multiple pages.
To add a tag more than once:
- Select the applicable tag.
- Drag and place it in the desired location.
- Select the same tag again.
- Drag the additional tag to another location on the same page or a different page.
- Repeat as needed.
Tags can also be removed from the form when they are no longer needed.
Please Note:
Tags placed on multiple pages remain attached when an endorsement is created from the form. The tags also remain in place when an endorsement is cloned or renewed.
When you are finished creating and tagging the form, click Save in the lower-right corner.
You will return to the Endorsement Forms Library, where the new form will appear.
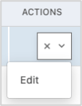
To make changes to an existing endorsement form, open its Actions menu and select Edit.

This will bring you back to the Endorsements Form Library manager.

if the endorsement form needs to be edits, click the "Actions" menu and select edit, to return to the editor.
Insured Specific Endorsements Library
Insured-specific endorsements can be created in three ways:
- From an existing form in the Endorsement Forms Library
- By uploading an endorsement without an existing form
- By uploading multiple endorsements through the Bulk Create Endorsement feature
Create an Individual Endorsement
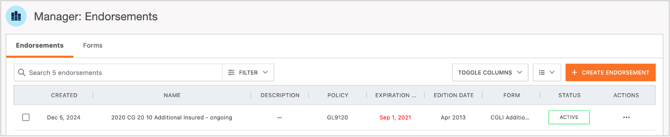
From the Endorsements tab, click the orange + Create Endorsement button.

Create an Endorsement From an Existing Form
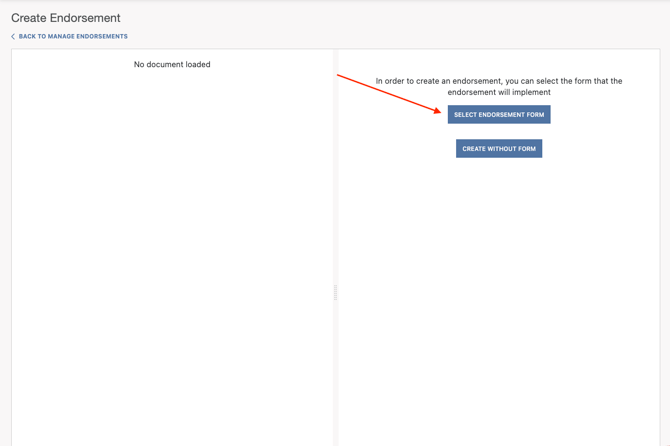
Click Select Endorsement Form to select a form from the global Endorsement Forms Library.
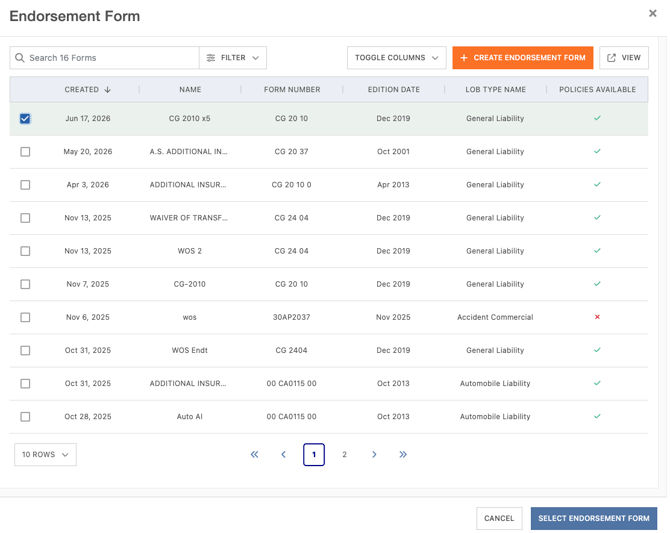
Select the form you want to use and click Select Endorsement Form again.
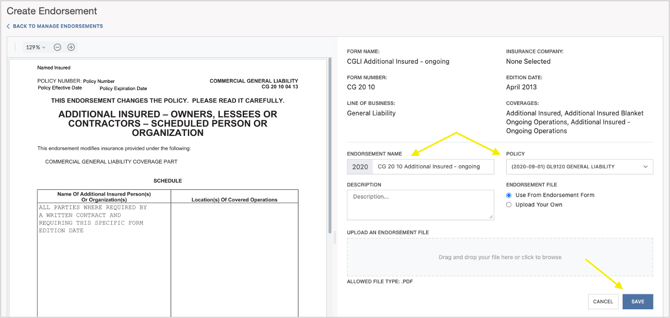
Complete the following fields:
- Endorsement Name: The name used to identify the endorsement in the insured’s library.
- Policy: The insured’s policy associated with the endorsement.
The preview window will display the tags configured on the selected Endorsement Form. If a tag was placed multiple times, each placement will appear on the endorsement.
When you are ready to proceed, click Save.
The endorsement will appear in the insured’s Endorsements Library.
Create an Endorsement Without an Existing Form
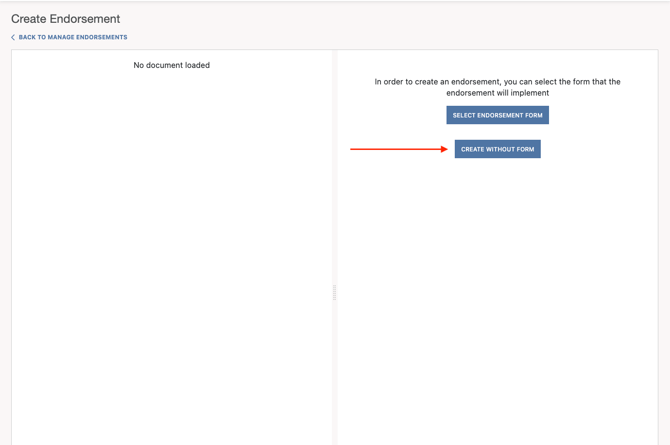
If the endorsement has unique requirements or will not be reused across insureds, you can create it without first adding it to the global Endorsement Forms Library.
Select the option to create an endorsement without an existing form and upload the endorsement PDF directly into the Endorsement editor.
Enter or review the applicable endorsement information:
- Endorsement Name: The name used to identify the endorsement in the insured’s library.
- Form Name: The name of the endorsement form.
- Form Number: The endorsement’s form number.
- Edition Date: The endorsement’s edition date.
- Insurance Company: The insurance company associated with the endorsement, when applicable.
- Line of Business: The applicable Line of Business.
- Coverages: The coverage or coverages associated with the endorsement.
- Policy: The insured’s policy associated with the endorsement.
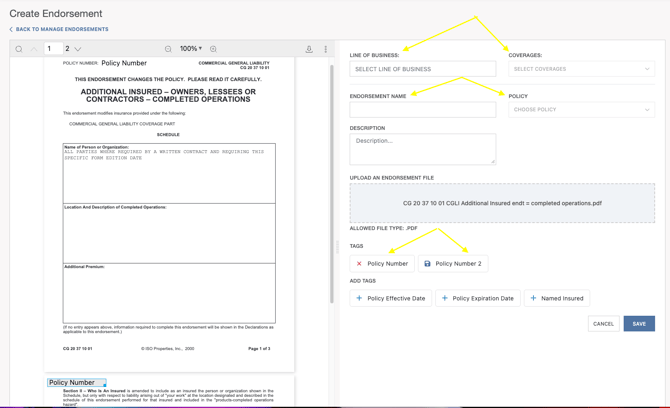
After uploading the document, use the preview window to review the endorsement and add any applicable tags.
The same tag can be placed more than once, including on multiple pages of the endorsement.
When you are ready to proceed, click Save.
The endorsement will appear in the insured’s Endorsements Library and can be added to a certificate.
Please Note:
Creating an endorsement without an existing form adds the endorsement directly to the selected insured’s library. It does not create a reusable form in the global Endorsement Forms Library.
Bulk-Upload Insured Endorsements
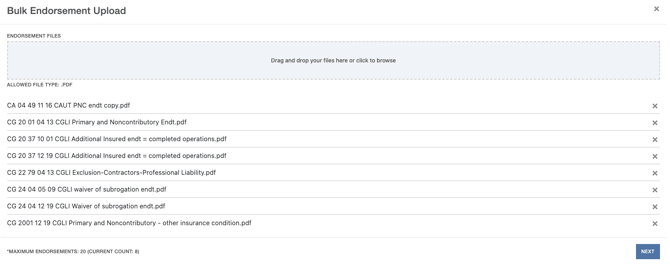
The Bulk Create Endorsement feature allows you to upload up to 20 insured-specific endorsement PDFs at once.
From the Endorsements tab, click Bulk Create Endorsement.
The bulk-upload window will open.
Upload the endorsement PDFs by either:
- Dragging and dropping the files into the upload window; or
- Clicking the upload field to browse your device.
Please Note:
- Only PDF files are supported.
- A maximum of 20 endorsements can be uploaded in one batch.
- The same endorsement file cannot be added twice within the same batch.
- Endorsement files must be separated before uploading. The bulk-upload feature does not separate or unstack combined endorsement PDFs.
The upload window will display the number of files added. You can remove any files you do not want to include before continuing.
The Next button will remain unavailable until at least one valid PDF has been added.
After adding the files, click Next.
Review and Complete the Endorsement Information
After clicking Next, the review screen will display each endorsement selected for upload.
For each endorsement:
- Review the Endorsement Name and update it if needed.
- Select the applicable LOB Type.
- Select the Policy associated with the endorsement.
- Select the applicable Coverages, when needed.
The Endorsement Name, LOB Type, and Policy are required. Coverages are optional.
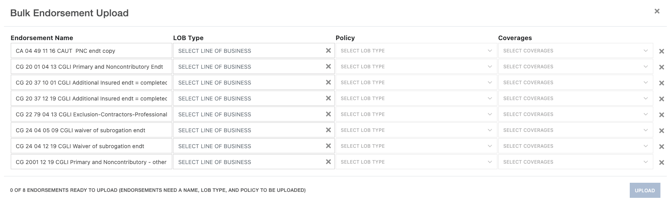
The counter at the bottom of the window shows how many endorsements are ready to upload. To remove an endorsement from the upload, click the X on the far right of its row.
Please Note:
Any endorsement missing a name, LOB Type, or Policy will not be uploaded. The Upload button will become available once at least one endorsement is ready.
Once the required information has been completed, click Upload. Successfully uploaded endorsements will appear in the insured’s Endorsements Library.
Manage Existing Endorsements
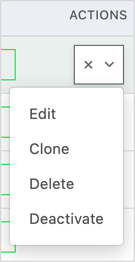
An active endorsement in the insured's library will have actions available:
Edit - this will allow you to edit the endorsement.
Clone - This will allow you to create an exact copy of the endorsement, which can be modified if a slightly revised version is needed.
Delete - This will allow you to delete the endorsement from Certificate Hero completely. This action will render the endorsement unviewable again.
Deactivate - this will allow you to deactivate the endorsement, removing it from view. This action will give the endorsement a new status of inactive, and it can be viewed again by utilizing the filters.