Users can create and manage their Certificate of Issuance Documents (CIDs) from the CID Manager. Within this manager, users can upload, edit and remove CIDs and other certificate processing supporting documents such as policy declaration pages and schedules. These documents will then populate within the CID tab of the Certificate Editor for internal review and assistance while a user is processing a certificate.
Additionally, the CID is a permission-based feature. If an agency doesn't require or need to use the CID feature this permission can be turned off. Without the CID permission, a user will not see the CID tab on the Editor, the CID manager on the left navigation bar, or the CID step in renewals.

To access the CIDs Manager, under the Managers menu, click "CIDs".

This will bring you to the CID Manager.
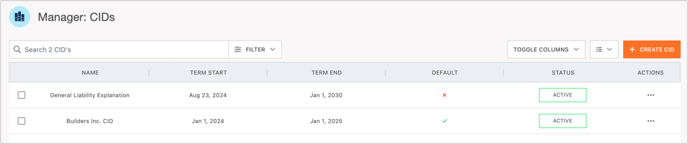
Depending on a user's permissions, and the status of the CID, a user can edit, set default, activate or deactivate existing CIDs.
If the CID is set as default for the insured, the only option under the Actions menu will be Edit.
Edit: The user can edit fields associated with the CID .

For all other CIDs that are not set as default, a user will see the following additional options.
Set Default: The default CID will populate first within the CID tab for this insured in the COI Template Editor and Certificate Editor.
Deactivate: Allows a user to deactivate a CID. Inactive CIDs cannot be selected from the Temple Editor or Certificate Editor. This action will give the CID a new status of inactive, and it can be viewed again by utilizing the filters. A default CID cannot be deactivated.
Delete: Allows a user to delete the CID, completely removing it from Certificate Hero. This action will make the CID unable to view again.

To add a new CID or certificate processing supporting document, click the orange "+ Create CID" button.
![]()
This will bring you to the CID Editor. On the right side of the editor, give the CID or document a name, select the effective date and expiration date of the document, and upload the form. If the document needs to be set as default, click the "Default Document" check box.
The allowed file types for upload include .docx, .xlsx and .PDF

When you are ready to save the CID, click the blue "Save" button.

You will be returned to your CID manager and the new CID or document will appear within your list.
